WH40K on budget Episode 1: Use your bitz söndag, Jan 13 2013 

Okay, today I am going to write something about costs. We all know that the miniature hobby and especially the miniature hobby associated with Games Workshops games are costly, Prices goes up all the time, yet we keep buying. I guess many are familiar with a term that have been floating around warhammerfan websites, namely ”plastic crack”. Now, my wife also drew the same conclusion.

”You are paying buckets of money for what is essentially cheaply made plastic toys! That buisness is just like the drug buisness, leeching on peoples fantasies. Have they no real competition?”

Well, In a way she is right, very right. Especially when it comes to GW:s product. Now, there are no way around the fact that GW and some of their slowly emerging ”competitors” are getting really good in quality, sharp lines, etc…

And if you have a strained economy you might think twice about picking up the hobby. But some of us who have been around for a while and who are true collectors have over the years managed to assemble something that is can help you along. It is generally referred to as bitzboxes.

I started to collect all spare bitz I did not use when I began. Today, I have done some separation into the main group but I still have my old general bitz box with stuff for armies I do not have anymore. As my son also collect, we got quite a collection today.

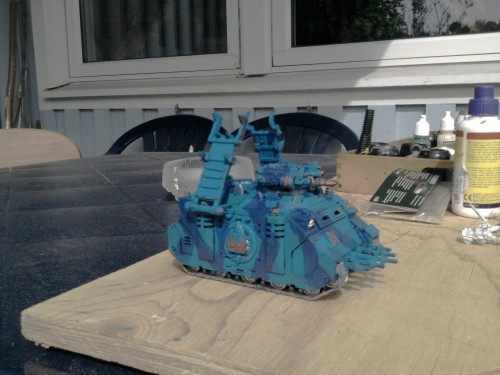
A while ago I started a yet unpainted conversion of a Sisters of Battle Exorcist tank. I used an ebay purchased Leman Russ, removed the turret and so on. Since I bought two second hand Leman Russes this meant I ended up with one Russ and two standard turrets with battlecannons. Last weekend I started to rework the second turret into something I had wanted to for a while. Making a turret with a dashing tank commander (who could be fielded as Knight commander Pask if I wanted to) and that packed Twin linked Autocannons. Then, I would be able to turn my Russ into a Leman Russ Exterminator by a simple switch of turrets.

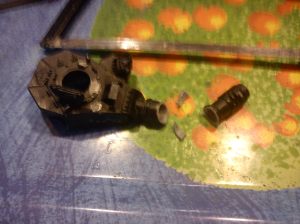
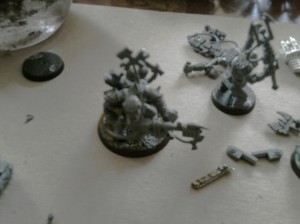
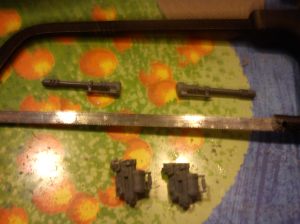
I found two Imperial guard Autocannons in the bitz and saved of their barrels. Then I took the lone Russ turret and saved of the Battle cannon at an angle. See photos below.

Sawn off autocannons

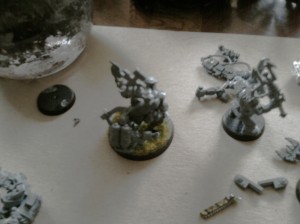
Sawn of Battle cannon

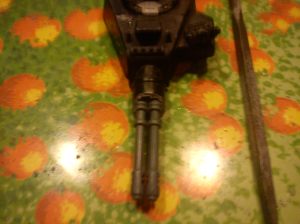
Excellent, now I needed to fit them autocannon barrels into the remains of the Battlecannon barrels and neat way. It started out with trimming them to fit together beside each other and then to work on the outside so they would slide into the barrel.

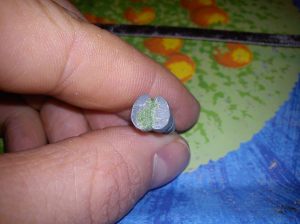
Autocannon barrels in place. Back of autocannon barrels

Well, I felt it worked out nicely. I did the final insert with greenstuff around that I worked so it filled out the gaps between the autocannons and the battlecannon barrel. Some paint and careful trimming and I am sure it will look pretty neat.

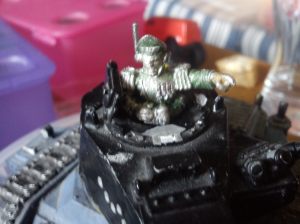
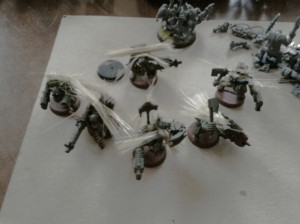
Now, I picked up an old metal tank commander miniature, with cap and plenty of medals to show of. He looked the part of a decorated Imperium tank ace. As you see, I lack the needed tank hatches so I will need to roam the boxes some more to find a good looking and believeable solution but with my tank commander showing the way, I bid you all goodbye and hope to see you next time around!

Cheers!
Imperial tank commander

http://windwraith.blogspot.se/ måndag, Dec 31 2012 

http://windwraith.blogspot.se/

My friend Vix, who is an ardent textile craftswomen and archaeologist, among many other things, got inspired by my post and made a post in her own long lost blogg. Go and have a look and encourage her to blog further!

Lets talk late roman shields! söndag, Dec 30 2012 

Well, it is over a year since I last wrote here, and before that… Ah, nevermind. Lets get down to buisness.

This Christmas holiday I decided to push forward with a project that have been lying still for a long while. Making a late roman oval shield for re-enactment and living history.

There are quite a lot of sources for late roman shields, both finds and pictures. Plus there are plenty of finds of shields used in northern Europe. The latter are round shields, bar the earliest that are long bordering to rectangular shield similar to those seen used by the celts.

While it is clear that the romans did utilize round shields, the standard shape in the late roman army was the oval shield. It was made like the germanic shields, of planks glued together. Then the shield was covered with linen or leather to increase the durability and help holding it together. To protect the rim, strips of rawhide were used, and finds indicate that it was infact stiched to the shield. Naturally this mean holes had to be drilled into the shieldboard to enable sewing it tight. Wether leather strips of thick linen treads were used for the stiching is unknown.

The size of the oval shields vary, the standard being around 1,10 meter high and 0,9 meter wide. I managed to procure a sheat of three-layered plywood of the dimensions 100×80 cm and decied to take that one. Hence my shield would be on the small side but this was partially intentional too. The roman infantry unit we want to re-enact is the Heruli Seniores, an Auxillia Palatina unit that can be traced between ca350-410 AD before it dissappears into the mists of time. The reason for choosing them is that they might have a connection to Scandinavia. The Auxillia Palatina units were elite formations who seem to have been the ones commanders turned to when they wanted some dirty job done. Hence, they not only acted on the battlefield, but also conducted irregular warfare of many kinds. The traditional legionary infantry, albeit seemingly more or less similarly equipped, seems never to have been used for such special operations.

Returning to shields, there are mentions in one source from the time about it being prudent to issue troops sent out on irregular warfare with smaler shields. Now, I still wanted that iconical roman oval shape but also a shield that did not weigh a ton and could be carried along on patrols and recon missions, or the occasional search and destroy random germanic settlement missions.

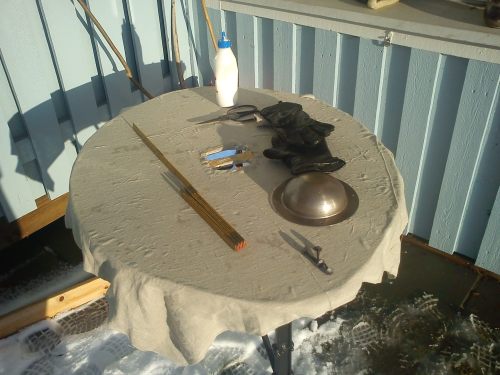
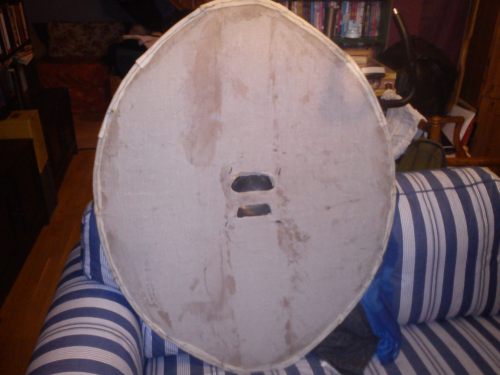
The reason for using plywood as base, although not historical, is that when fighting with the shield, safety is important. I have seen a blunted speartip go straight through a weak spot on a plywood board so I take no chances. That shield was not lamenated in any way, and with the surface layer gone it was weak. However, the ancients almost always covered their shields with textiles or leather. Hence I used two layers of linen cloth and glued it to both front and back. This makes me fell certain my shield will hold against what I can encounter on the re-enactment field of battle. Truth be told, I would trust upon it would I have to fight for real, at least to some extent.

DSC00412

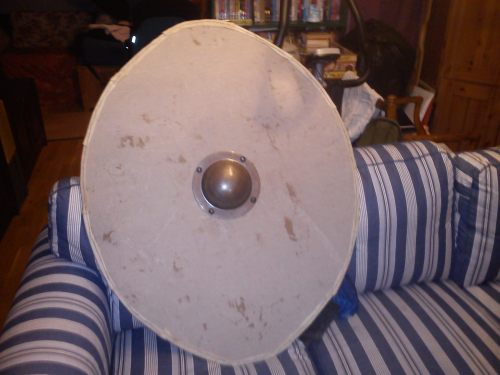
So I glued the front and back covers unto the shields on different days so it could glue properly. Then I nailed the shieldbuckle in place and adjusted the grip. As you will see, I have an integrated grip, a thing that is re-occuring on roman shields and on many of the shields from the danish bog sacrifices. I am considering laying an extra grip on it to make it thicker and sweeter to the hand.

DSC00414

DSC00413

Well, finally I attached the shieldrims. I used dogchew made from rawhide that I soaked in water and the unrolled, picking the pieces that were useful, cut them to shame and threw the rest away. However, before I could do any more I had to bring forth my electrical drill and get to work. So I drilled stichholes all around the edge of the shields and then commenced sewing the the strips to the shield while they were still soaked and flexible. I either used two treads and used the shoemakers stich or sewed back and forth achieving the same effect. I used linen thread meant to be used as warp for a loom, being the most durable tread I had. Now, if it lasts remain to be seen. Some people recommend using strips of rawhide itself, but I simply could not bother myself with cutting multitudes of thin strips, let alone attaching them!

Anyway, the final result looks okay to me! If it will last for any time is another matter. Now, the shield must be painted, but I think I will wait until spring comes so I can do that outside and not risk having my three-year old running around painting the apartment with egg-tempera.

Until next time!

And back again… måndag, Dec 5 2011 

It is a bit pathetic when one gets back to a blog once started because you suddenly are requested to delete rubbish commentaries form people abusing an seemingly abandoned blog. But I would guess the best medicine  from unwanted guests is to get active again! So watch this place…


Iron age style woven band part 2- tisdag, Jul 28 2009 

Okay, as I proceeded with my weaving today I came to a point where I decided it was best to halt, and use what I hade made for cuffs. As it turned out, I failed to measure and when I had cut of the first part of the band I did not have enough for both cuffs.

Well, I decided to use the band for one cuff and save the remants for… well, you never now when they might come in handy…

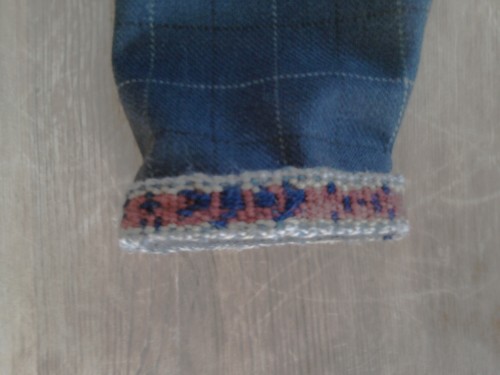
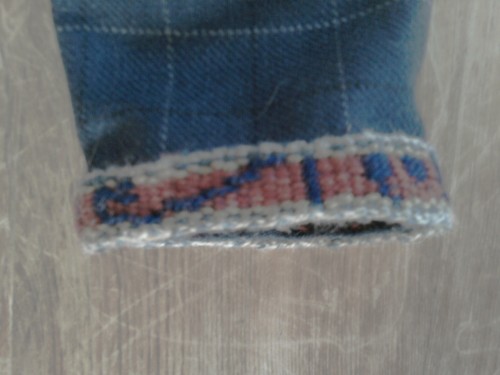
So, this is how the right hand cuff looks after having attached the tabby woven band!

Right arm cuff

I used a very common composition from the period, two beasts opposing each other with a man in between. Well, at least it´s supposed to be man, the little figure to the right. You see the jaws of the left hand beasts to the left of him.  The beasts are supposed to represent bears, since bears had a special place in northern mythology and I personally like bears!

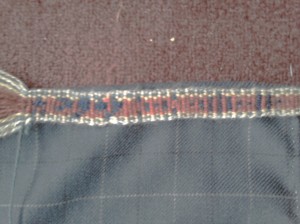
Here is the other side of the cuff:

Other side of right hand cuff

I tried to make a dragon/snake here, but it did not get that good looking. Well, I keep on trying so maybe better next time.

I found it fitting to have  snake on my swordarm cuff, since the snake represents speed and lethality, and sometimes swords where given names like ”The viper” etc…

Anyway, I am now to start making the left hand cuff. I think I will do a somewhat different composition maybe having the same opposing bears but with something else too, just because it´s the left hand side.

One idea I have is to make the symbol of the ”Helm of awe”. You can´t say for certain the sign was used back then, but most likely it was. And unlike much of the so-called runic lore used today, we know what the Helm of awe was meant to do, unlike the later day attributions to the old runes. We know they where used for magical purposes but you can´t say for sure which was for which, bar for a few.

What is today usually called for rune magic etc. is based on later constructions, from the medieval period and inspirations during the 19th century. That won´t do for me!

But now I am getting of topic. Back to weaving!

Imitating iron age tablet woven bands on dresses – chapter one måndag, Jul 27 2009 

Patterned band for iron age dress

Alright, this is my first post about living history and re-enactment here. I will try to post these ones in english aswell, as I have some mates that will not be able to read swedish.

Anyway, a week and a day ago I was on a medieval market I bought myself a beautiful greyish blue wool cloth withe discrete square pattern. It just screamed migration period to my me and after the mandatory stroking and patting of a range of cloth to really get the feel of them, I settled for this one and bought about 1.75 meter of it. The reason buying so little was that I had to conserve money, so I took a little bit more than I knew was needed for the kind of tunic I had in mind.

Anyway, after a few days of intensive work and tired fingers, the tunic was finished. And after some pondering I realized I still had cloth left to make a new pair of hoses for my medieval grab, with some fiddling and fitting of course.

Anyway, I did feel the dress deserved something more. It was meant to be a more good looking tunic that my old worn off-white working tunic, who has now been transfered to the extra and overtunic department.

Decorating finer tunics with tablet woven bands is well attested to in the north European context, and it is also mentioned and seen on the few relevant illustrations we got. Now the finds we have are all from graves, usually from rather well to do or even very well of persons, bar some cases from Norway where some graves seems be over commoners and yet contains some textile remants.

The preserved tablet woven bands are extremely well made and advanced, and most of what you can buy is not even of the quality seen even in the middle ranking graves. And I don´t have the money to buy or order anykind of tabletwoven bands. But I do weave bands of simpler designs myself, or at least I have made two, that you can make on a loom or by a tool in Sweden called ”bandgrind” (bandgate – if you know the english term, please tell me!).

So, I reasoned, it must be possible to make a band using the simpler techniques that still gave an impression of how the richer tablet woven bands looked, with dramatic figures and geometric designs. After studying a book my mother-in-law gave to us, I found a way and went to work!

Having looked at 5th-6th century art and imagery from Northern Europe and from the Roman areas I decided to work it out as I got along. The wise voice told me to create a pattern and a plan before it, but the rashness of ADHD, my imagination and the sullen voice of my Asperger picture memory convinced me that it would be unnecessary modern style hazzle and that it would be better (read funnier and more creative) to create the pattern in the head as I moved along the band.

Tell me what you think of it sofar!

Big Mek Oddball an da pimped out Skorchawaggon! lördag, Maj 23 2009 

Oiii, you lot!!!

Long time no see! But da Mek haz been busy see, as has da masta oiler.

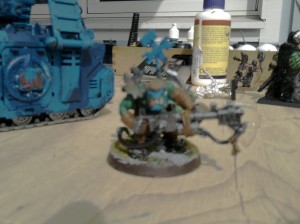
Anyway, last weekend I finally got around to finish my Big mek model of Oddball and Moriarty.  Sadly, my mobile cam does not lend itself to take nice close-up pics of minis, but at least it will give you a hint about this daring duo!

Big Mek OddballI will have to add a pinch of yellow to the tip of his zig, but I hope I will be able to present some better picks of him and the other ladz in the end.

Faithful to a fault, and the true mechanical genius in the warband, is Masta oiler Moriarty. He is basically as high ranking a grot can ever become, and he never leaves his boss´s side.  Sure, he will get slapped around the head now and then, but generally, considering the extremely good and gentle mood Oddball regulary have, it´s nothing to bother about.  And the rest of the warband keeps an eye out for him, since everyone is well aware of who is the real mechanical genius,  and that sure as Morks pants ain´t Oddball!

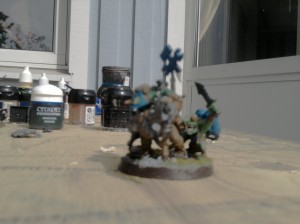
Oddball & Moriarty

Moriarty carries the container for the Burna and I made a hose out if greenstuff to link them together.

Gamewise, Moriarty counts both as 3 grot oiler and an attack squig. He got a blade after all and will fight fiercely in defence of his boss because he feels a kind of responsibility toward Oddball that is hard to place, but still present.

I am wondering about how I could sort of symbolize his oiler ability by making some small tokens that could be used to represent it, since he himself is not removed. I shall return to that later.

Moriarty is the real mechanical genius, and Oddball is infact not particular gifted. He is called Oddball because honestly, the other orkz think he is simply mad. He can´t really be placed into any set Oddboy category, but he really loves machines, so he got into the mek side of stuff.

However, his biggest asset is his ”posutive tinkin!” and in true greenskin fashion his positive thinking and total relaxed conviction that his blue painted mek pole really gives luck,  means he produce the same effect as a Kustom force field by his mere presence! If it fails he will however growl and scowl at the usual suspect, mostly Moriarty, and tell them to ”Knock it ov wiv them negative waves!”

The last work of this dynamic duo is the brand new looted Skorchawaggon that they made, based on an abandoned Imm0lator. Well, it is highly likely they infact managed to steal it from right under the noses of the Adepta Soroitas.

What I did was that I took my finished Immolator and simply pimped and repainted it hastily. After all, I doubt the orkz would bother that much with removing paint and stuff, but instead they went over it, kept what they liked, and slammed some glyph plates just to make sure it looked Orky enough.

Also, they have remade the tower, keeping the twin heavy bolters, but added a nasty skorcha to the mix!

Da Skorchawaggon

It is used as a ”enjineerin waggon”,  hence the boarding planks, alluring to the mobile bridge that plays a part in the movie of Kellys Heroes.

I made the tower by only using the base of the tower, and placing one of the heavy flamer on it´s side, after some recutting. Then I used pieces of plasticard to enclose the tower in a rough and ready orky fashion.

That´s all for now, folks!

Imperial guards reborn onsdag, Maj 13 2009 

Well, come May and come the new Codex Imperial guard.  I was so happily pleased with it, and thanks to a gift of 20 unpainted Cadians and some smaller purchases and some trading with my son,  I can assemble a Company HQ and three Veteran squads (fluffwise remant platoons). One can also act as a penal company if I feel for it, but I want to try that First rank fire, second rank fire Order with an all-lasgun armed veteran squad.

I added my Entire Sisters of Battle force as allies, which fits perfectly, since they consists of 1 HQ, 1 Elite, 2 Troops & 1 Fast attack.

Here is my preliminary list at 1500 points!

Moisin rifles with allies – Comrades and sisters.

HQ 1: Commands squad 401 Moisin  Rifles, 3rd Company

Captain Rokossovski, plasma pistol. Standard bearer, lascannon team, 2 Bodyguards & Master of Ordnance Total: 185 Rokossovski is a hardbitten but popular commander, presently commanding the remants of the 3rd company

HQ 2 (Allied): Canoness Deborah
Rosarius, power weapon, Bolter-Flamer, Lithanies of Faith & Cloak of St. Aspira Total: 135
Deborah is Canoness of the Hereditary Ecclesiarch Garrison on Moltova, that is charged with ensuring that the Heresy of Glorious Mankind never return to haunt Moltova. Her forces are also used to reinforce Moltovan guard regiments on important missions.

Elite 1: (Allied) Celestian squad Mirjam
Veteran superior with with Enviscerator and book of st. Lucius. Squad with frag grenades, Meltaguns and Heavy flamer. Simulacrum Imperialis  [Total: 222
The closest retainers of the Canoness

Troops 1: Platoon Frunze (Remants)- Veterans squad
Sgt Frunze with Power sword. Heavy bolter, Sniper rifle, grenade launcher & Plasma rifle. Doctrine: Forward sentries  Total: 145
The companys best stealthers

Troops 2: Platoon Malkov (Remants)- Veteran squad
Sgt Malkov with power fist. Lasblasters(shotguns), 2 melta guns & heavy flamer. Doctrines: Demolition Total: 155
The remains of the assault platoon

Troops 3: Close protection Platoon Karelin (Remants)-Veteran squad
Lasguns and Doctrine: Demolition  Total: 100
What´s left of the close protection half-platoon. Lightly armed but packing meltabombs and explosives (Lassprayer squad)

Troops 4: (Allied) Battle Sister squad Elena
Vet. Superior Elena with Enviscerator and plasma pistol, 2 storm bolters & frag grenades Total: 180
The squads task is to deliver small arms fire support and hold ground, but are prepared to counterattack if necessary

Troops 5: (Allied) Battle Sister Squad Sarahi Vet. Superior Sarahi with Bolter-Melta and power mace. Melta gun, heavy flamer & frags Total: 177
This squad follows the Celestians into the assault

Fast Attack 1: (Allied) Seraphim squad Magdalena
Vet. Superior Magdalena with powersword & Book of St. Lucius. Two Seraphims with twin handflamers. Meltabombs Total: 195

The angels of absolution

Army Total: 1494 points

Not the hardest army in the world, and nothing painted yet, so you will not get to see any pics this time!

But I am itching for trying it out in a Cities of Death battle. My son also wanted us to run a Guard vs. guard battle at 500 points, just for some infantry kicks!

Space Orkz continued: Oddball makes Big Mek onsdag, Maj 6 2009 

Hello again!
After a day of inspiration, I realized good old Oddball deserves to be real character. So I made him a Big Mek and his Positive thinking clearly counts as a Kustom force field!
Now, in truth, this positive thinking is what Oddball truly contributes, cause he is shite with mechanics!
Luckily for him, he got his trusty grot mek Moriarty, who is the real brain behind the warbands vehicles. Gamewise, Moriarty counts as 3 Grot oilers, and woe betide the person questioning me about the rule legality of that!!!!

I took the plastic Mek from the Burna/Loota box, gave him the designated Oddball head and put him on a larger base, formerly belonging to a metal Eldar Wraithlord.Oddball in progress
Moriarty is a bit hard to spot at the moment, being a little grot as he is, but here is a pic from behind. Moriarty is carrying the promethium contatiner for the burna.
Oddball and Moriarty in progress

Also, I have finished my first Kommandoz mob, and I fell so much in love with them I decided to scrap the Burna mob and go for a second Kommando mob packing two burnaz instead. Way cooler and more in line with the sneaky Kelly´s heroes theme.
Here they are, moving forward in a wedge formation. I imagine the Big shoota gunner covering the rear is Crapgame, constantly complaining about how much the Big shoota weighs!

Mouving in with Kelliez Kommandoz

Next time I will show how my Sisters of Battles Immolator became a Looted Skorchawagon/Looted Trukk!

Until then!
WAAAGH!

A short update on the Orkz progress söndag, Maj 3 2009 

Yes, time flies when you are painting.

Recently, I have finished both the slugga boyz mob, now consisting of 13 boyz and one Nob, and also the Kommandoz mob, of 5 Kommandoz and Kommando Nob Kellie.

They are the first to be kited out with model feldgrass, intent on simulating attempts to hide themselves within long reed and similar tall grass.
It is not a perfect result, but hey, they are orkz, they think it works!

I have tried taking pictures that will do them some justice and shall put them up tomorrow!

Nästa sida »